


Bike fits, at their core, focus on aligning a bike with the unique needs of a cyclist’s body and goals. In the same vein, MyVeloFit doesn’t offer a one-size-fits-all solution but tailors the experience to the individual rider. Recognizing that both cyclists and their goals evolve over time, our method is designed to adapt, ensuring you’re always in tune with your current needs. With this bike fit guide, we aim to shed light on the multifaceted process that is MyVeloFit’s online bike fit.
STOP! Everything beyond this point, while helpful, is unnecessary to getting started with MyVeloFit. You can absolutely just create an account now and follow the instructions provided. However, if you’re like us and want to over prepare, welcome and read on.
So, without further ado, let’s outline the journey ahead. Here’s a detailed table of contents to navigate the upcoming stages of your MyVeloFit experience:
- What to Expect From Your Fit
- Getting Setup For Your Fit
- Assess Your Mobility
- Start A Fit Session
- Pre-Analysis Adjustments
- Film and Upload a Video
- Analyze Results
- Make Adjustments
- Repeat The Process
- Adapt To Your Position
What to Expect From Your Fit
Going into a bike fit it’s important to be in the right frame of mind. As many riders haven’t experienced a bike fit process before there are many misconceptions out there as to how the process works and what it should feel like. This is even more so the case with online bike fit processes like MyVeloFit.
Why Get a Bike Fit?
The first question you should ask yourself is why are you getting a bike fit? A very common misconception is that there is some objectively “correct” position that you should be chasing, but in reality it really depends on your goals. Going into the process with some sense of what you’re looking to achieve, whether that’s comfort, performance, injury prevention or some combination of all the above will go a long way. Later in the fit process you’ll be asked to set a fit goal, but for a more detailed discussion on balancing your goals in bike fit we recommend checking out our post on the subject.
The Bike Fitting Process

The MyVeloFit process is iterative to achieve the best results
Every bike fit, whether in person or online follows a very similar process. This involves getting some level of rider history, a physical assessment, then completing an iterative process of on-bike analysis and making adjustments. There are two parts of this process that are worth highlighting:
Physical Mobility Assessment
What makes a bike fit successful is that it’s personal. How YOU move will play an important role in determining what riding position will work best for you. In our case, completing a mobility assessment is a key step to getting recommendations that are personalized for your body.
Iterative On-Bike Analysis
The iterative part of a bike fit process is often misunderstood. Especially with online bike fits, a common misconception is that it’s likely to go from your current position to your final position in one or two adjustments. This is not the case, you should expect to make multiple repeated adjustments (unless you are already very close to your target position). There are two main reasons that this is very unlikely and often undesirable:
- Every person responds to changes differently. A 10mm saddle height change for one rider may make a world of difference, whereas for another their body can essentially absorb it with little overall impact to their position. Equally important, the first 10mm change can make little to no difference, but the next 5mm could be incredibly impactful. This can’t be known until you make the adjustment then analyze the impact.
- Human bodies (in general) don’t adapt well to big changes all at once. This is especially true when they’ve been doing a thing one way for a long time (e.g. riding in a certain position). Even objectively good changes to a rider’s position can feel absolutely horrible at first, because change is hard. This is why making multiple smaller changes is often preferable and typically more successful than one large adjustment.
 Expected Adjustments & Equipment Changes
The bike fitting process is about making changes to your bike (and equipment) to help place your body in a better riding position to achieve your goals, be it comfort, performance or other. This involves making adjustments to you bike as it is but can also require switching out parts when the ones currently on the bike cannot achieve the desired outcome. Bike fitting can get a bad wrap as simply an excuse to upgrade parts, but the reality is that you don’t need to upgrade your parts, you just need to make sure the parts you have are the right size and shape for your needs.

A bike fit often requires both adjusting your bike and replacing parts
Before getting into your bike fit, we find it helpful to understand the scope of the adjustments that you might need to make, as well as the common changes in components that might be required to achieve a great riding position.
Possible Adjustments
- Saddle height
- Saddle Fore-aft
- Saddle Tilt
- Handlebar rotation
- Hood height (on drop bar bikes)
- Lateral Hood angle
- Stem height
- Stem rotation (positive to negative or vice versa)
Possible Component Changes Needed
- Stem
- To change handlebar reach and sometime stack
- Note: if you have an integrated cockpit changes to stem length are often still necessary to achieve the best riding position. This means replacing the whole cockpit. Yes, this is expensive, no there is generally not an alternative.
- Saddle
- To better match your body (shape, width, material, etc.)
- Handlebars
- To match shoulder width and sometimes impact reach
- Seatpost (offset)
- Generally to provide additional fore-aft adjustment in one direction or the other
- Cranks (length)
- To improve pedaling dynamics, particularly over the top of the pedal stroke
Getting Setup For Your Fit
Setting up for completing your MyVeloFit bike fit is a crucial step for success. While it’s not complicated, a few very simple changes can be the difference between a seamless fit experience and frustration. If this sounds like something you want to make sure you get right, head on over to our comprehensive post on how to get set up for your fit. If you’d like the quick overview we’ll cover it here and all the instructions you need will also be provided during your fit.

A good setup can be the key to great fit
Broadly speaking, there are three components to the setup:
- The Rider (you)
- The Setup (your bike, trainer, room, and camera)
- The Video (what we analyze)
Following the instructions for each of these components of your setup will get you the best results. In short, this is what you need to know
The Rider
- Dress the part. Bike kit is ideal, but any athletic clothes will do the trick. Avoid all black.
- Get warmed up. Cycling is an athletic pursuit, our bodies move differently once warm.
- Hand position matters. Each of our fit profiles have a designated hand position. Put your hands there and don’t move them during the fit.
- Be natural, just pedal. Don’t pedal slowly, or do an all out effort, just pedal like you’re out on a normal ride.
The Setup
- Level your bike. Make sure your axles are roughly the same height off the ground.
- Light the rider. If the video looks dark, it’s hard to measure, make sure the rider is well lit.
- Camera distance. Needs to be far enough away to see the ENTIRE rider at all times.
- Camera height. Around saddle height. Do not put the camera on the ground.
- Camera Angle. Straight in every way (level, centered and square).
- Be Consistent. Follow the above every time you film.
The Video
- Use Normal Settings!
- No slow-Mo
- No wide angle views (e.g. 0.5x on your phone etc.)
- Trim the video to length.
- If you take a longer video, be sure to trim it down to 10-15 sec where you are pedaling consistently. Do not include getting on or off the bike, or starting or stopping pedaling.
Assess Your Mobility
Your mobility assessment is a key step to getting the most out of your fit. Without a mobility assessment, you will receive generic recommendations rather than personalized ones. To make this as easy as possible we offer two mobility assessments:
Quick Assessment
- A questionnaire to help you score yourself on five different elements of mobility.
AI Video Assessment
- Film yourself completing a series of movements and receive a mobility score for each.
If you’d like to understand more about why mobility is so important to fit we have a wonderful blog post from our partners over at Dynamic Cyclist that provides a great overview.
Start A Fit Session
Creating a fit session is the first step in completing the on-bike analysis. This is what most people think of when they think about a bike fit. The fit session essentially sets the context for that fit; what kind of bike you’re using and what you want to achieve.

A fit session is the context for every fit.
Bike Type
MyVeloFit offers seven different bike types and corresponding fit profiles to help you with almost any bike you have. Selecting the appropriate bike type is the first step to a successful fit.
- Road
- Also recommended for smart bikes like Tacx Neo Bike, Wahoo Kickr Bike, Staged SB20 etc.
- Gravel / CX
- Mountain (XC oriented)
- Hybrid
- Triathlon
- Time Trial (TT)
- Spin (for spin bikes like Peloton/Echelon etc.)
Fit Goal
Your fit goal helps define what your priorities are in the fit and therefore the type of position you’ll be guided towards. It use to be that your bike type essentially dictated your position, but we know better now and can help you find the right position on any bike type based on your needs. To do this we offer three fit goals, which broadly orient you from a more upright riding position towards a more aggressive one. The three goals are:
- Comfort
- Performance and Comfort
- Performance
To understand in more detail how to pick the right fit goal for you, check out our full post on choosing the right fit goal.
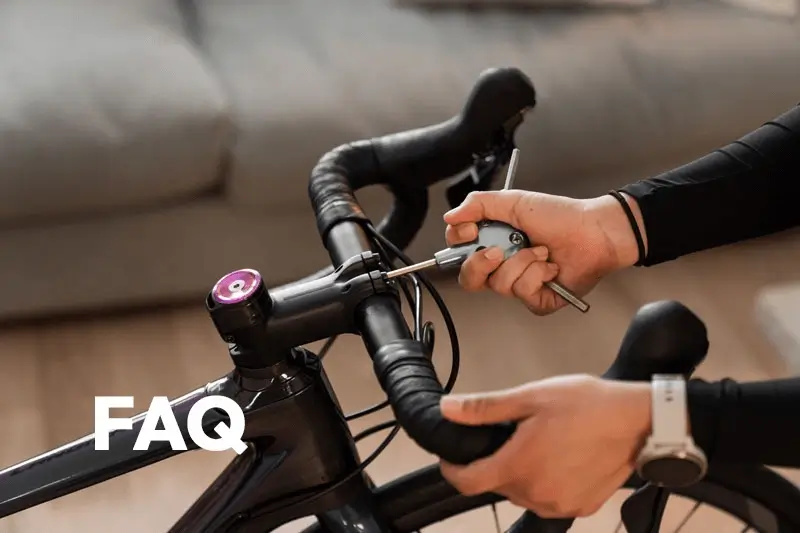
Pre-Analysis Adjustments
Before starting the riding analysis there are a few key adjustments to consider that aren’t directly measured during the process but will impact the results. Being aware of these adjustments may help you later as you’re dialing in your new fit, but many of them can help you ensure you’re not starting your fit with outstanding issues.
The pre-analysis adjustments we always recommend are as follows:
Set up shoes and cleats (For clipless pedals)
- Choosing shoes and appropriate footbeds/insoles
- Set your cleat position (<– DO THIS!!!!)
Check handlebar rotation
- Full post on bar rotation and hood positioning
Set hood/lever position
- If you don’t have a preference: level with each other, slightly up, and straight (NOT outward)
Set Saddle Position
- Level, Straighten and Centre Your Saddle (if you’re not happy with current position)
- Full post on setting saddle tilt
Once this is complete we’re ready to really dig in.
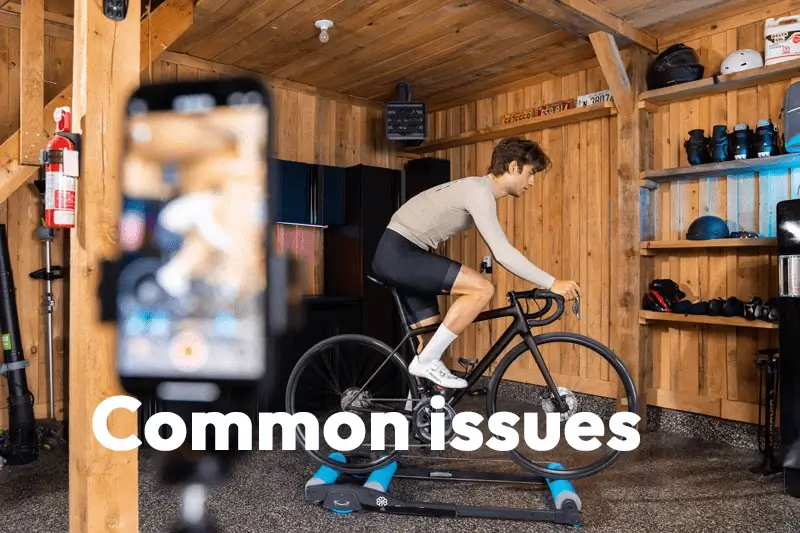
Film and Upload a Video

Filming yourself riding provides deep insights into your bike fit
At this point you’ve done everything you need to prepare and it’s go time. With your camera set up as described, we offer two options for filming:
- Use our built-in video capture.
- You can set the timer for how long you want before it starts recording to avoid the camera seeing you get on the bike or the start of your pedal stroke. Then just press record, hop on your bike and ride.
- Record your own video and upload
- You can record a video as normal using the camera on your device or any other camera you like and simply upload it to your fit session.
- Be sure to trim your video as discussed to include 10-15 sec of you riding consistently. No getting on or off the bike, or starting or stopping pedaling.
Once you’ve finished recording and uploaded your video, just hit “Analyze” and let the magic happen. In about two minutes your results will be ready and you’re ready to start making changes.
Analyze Results
Now that you’ve got your results, before doing anything we recommend reviewing your full fit report. It can be easy to just jump right into adjusting things, but understanding a little more about what’s going on can make a big difference in how quickly you’ll arrive at a great position.

The bottom of pedal stroke analysis is just one part of your fit report
Your fit report has four main sections:
- Recommended Adjustments
- Position Analysis
- Top of Pedal Stroke
- Bottom of Pedal Stroke
- Front of Pedal Stroke
- Overall Positioning
- Video Overlay
- Previous Assessments
Each provides a different set of information and lets you dig into your position in different ways. There’s a lot to digest, so we recommend checking out our more comprehensive explainer on our fit reports here.
Make Adjustments
So it’s time to make adjustments, but what you may not realize is that the order you make them in can significantly reduce the number of total adjustments you need to make. Your fit report will give you all the recommended adjustments right up front (other than saddle fore-aft), but we recommend not making them all at once until you’re a bit better acquainted with how they interact.

Adjusting your bike in the right order makes the fit process much smoother
In general, this is the order of adjustments we recommend:
- Saddle Height
- Saddle Fore-aft
- Handlebar Height
- Handlebar Reach
Perhaps most importantly, avoid adjusting anything at the front end of your bike before your saddle position is set. The location of your handlebars will be set relative to your saddle position, so you can easily find yourself chasing your tail if you’re adjusting both at the same time. Perhaps unsurprisingly at this point, we’ve got a more detailed post on the order of adjustments and why that we recommend you check out.
Adjusting Handlebar Reach

Reach on your bike can be adjusted in several ways.
Though most of the recommended adjustments provided are quite straightforward, handlebar reach is often the one that feels the most confusing and presents the most options for how to achieve it. Though it’s typically accomplished by swapping out your stem (sorry if you’ve got an integrated cockpit) there are a few other ways to make minor but impactful reach adjustments. Check out our complete post that explains how you can leverage each when adjusting reach.
Repeat The Process
Remember that part way up at the top of this post where we said bike fitting is iterative? Well we’re here. You’ve made your FIRST round of adjustments so now it’s time to record another video and find out how those adjustments have impacted your riding position. A bike fit is not about the measurements of the bike, it’s about how your body is positioned on the bike. We use measurements of your bike as an easy way to help communicate the settings that put your body in a certain position, but they are not what matter. What matters is the position your body is in and how it moves.

The MyVeloFit bike fit process
It is completely normal at this point in the process to receive similar or the same recommendations you got the first time. This isn’t because the software didn’t recognize you made a change or that it made the wrong recommendations, it’s just that your position hasn’t changed enough so you need to keep going. If you’re concerned about this, checking your individual joint angles is a great place to track progress. If one of your angles is way outside your target range, this is a good indication that you may need several rounds of adjustment.
Adapt To Your Position
This is the final step in the process and the one most often overlooked. A bike fit is often not an aha moment (though it absolutely can be). As appealing as it seems to think you’ll make all these changes and everything will just feel better immediately, that’s not generally how it works.
There is a saying out there that “bikes adjust and bodies adapt”. Well, some bodies adapt quicker than others and it’s completely normal for it not to be immediate (especially if you’ve been riding a long time). Saddle position is perhaps the most obvious adjustment where this is noticed, but it can take several rides, sometimes even a few weeks of riding to adapt to a new position. Especially when making large adjustments, your new position can feel quite weird and even wrong. It’s normal to experience some muscle discomfort as your body adapts to a new way of moving.
Don’t give up here though, give it time before assessing if it’s been a success. It’s common to need to make final tweaks and adjustments after the adaptation period as you start to acclimate to the new position.
Just The Beginning
We like to say that bike fit is a journey. This fit process you’ve completed is just the beginning of yours and hopefully not the last you’ll complete. A bike fit represents a snapshot in time based on where you are as a rider and your body. As humans and athletes we change over time and so it’s completely normal for your riding position to change with it. This can be on a bigger scale over years, but also within a year as we go through seasonal changes in our riding volume and fitness. To learn more about why your bike fit should be evolving with you check out our longer post on the topic.